Import Data in SQL Server – A Step-by-Step Guide on How to Import Data into SQL Server with Examples
How To Import Data into SQL Tables Beginners Tutorial
Import Data from a Text or CSV file into SQL Server
How To Import Data from Excel Data into SQL Table in SQL server
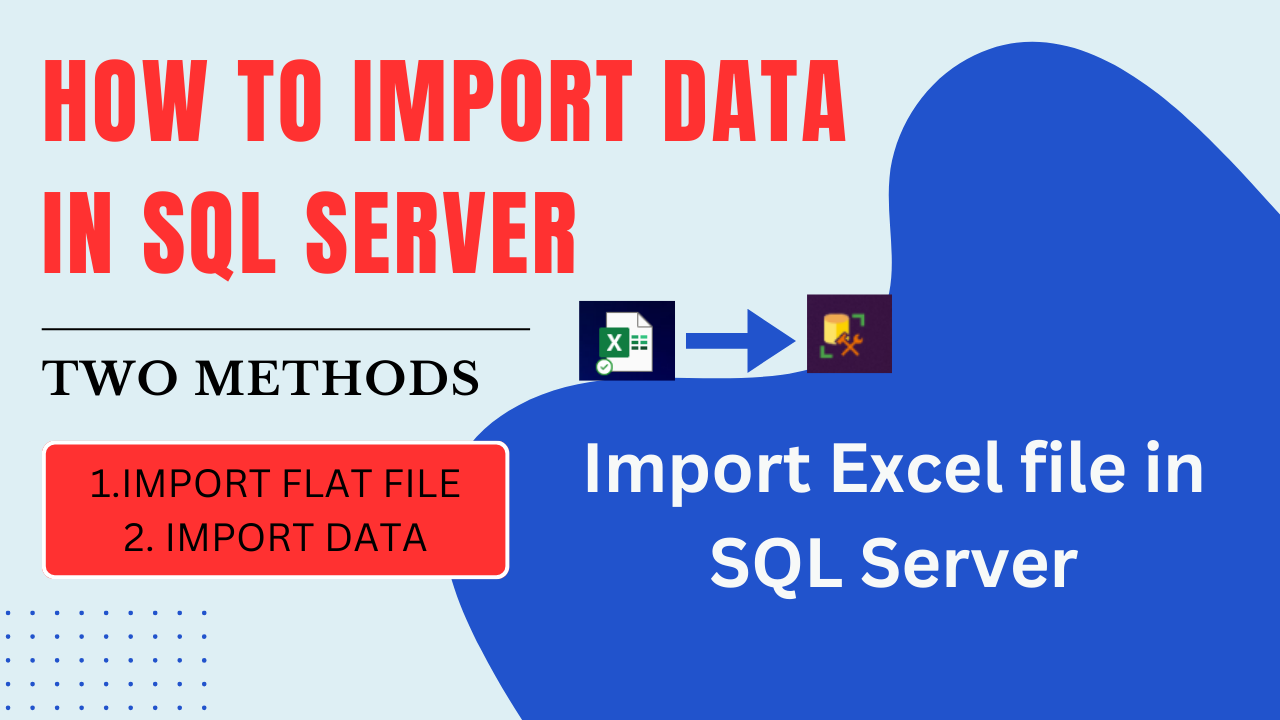
In this tutorial we will learn how to Import CSV, TEXT and Excel file in SQL using Two Methods
Table of Contents
1. Import Flat File
2. Import Data
Let us see one by one to import data in SQL server.
Steps to Import Data in SQL Server: Import Flat file Method.
Introduction:
Import Data will help you to import content or data of file into a new table. Importing data in SQL server is taking of external data into a SQL Server database in the form of new table. when we import any flat data like txt, csv, excel data into SQL server database it will be stored in new table.
Imported data will be Stored in New table with your flat file name by default, you can give table name as per your requirement while importing and also you can customize table setting like data type, column names, size etc. You can Customize the destination to import data, you can either create a new table or import into an existing table.
Data can be imported for migrating data from another system or updating existing tables from external data or creating a new database table.
Import data is very easy process in SQL server, In this article we will learn step by step guide on how to import data into SQL server | How to import data in SQL server from csv, Excel and text file.
Step By Step Guide How to Import Csv, Excel or Text file in SQL Server
Below are the steps to Import data in SQL server 2019.
Step 1: Prepare Your Data
Prepare Data before importing, make sure that data in file is well organized and compatible with SQL server, if you are importing in Existing table make sure that columns sequence and data types are same as like destination table. and if you are importing as new table you need to specify the columns data type as per the data present in the file.
suppose you have a column like address and its data type and size is shorter than you need to modify the address column otherwise you will get as error while import. to Import Data in SQL server Supported file formats include CSV, Excel, and text files.
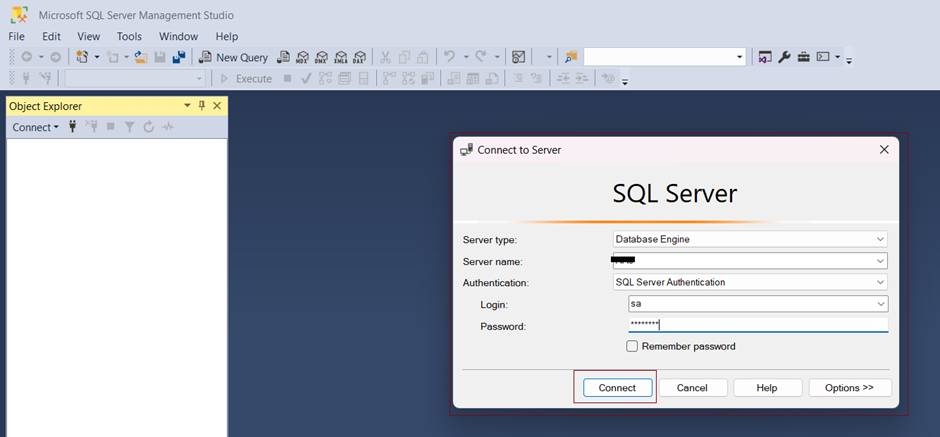
Step 2: Connect to SQL Server Management Studio (SSMS)
The first step for everything change in database is to login to the SSMS. here is same for Import Data in SQL Server connect to the SQL Server instance.
To connect with SQL server, you can use SQL Server Management Studio (SSMS) or SQL client like SQL Dbx or that you are comfortable with. Ensure your login user must have necessary permissions to perform data import operations.

Step 3: Choose the Import Method
SQL Server provides many ways to import data. For this example, we’ll choose on the “Import Flat File” wizard, a versatile tool that supports various file formats.
Steps to Import Data in SQL server.
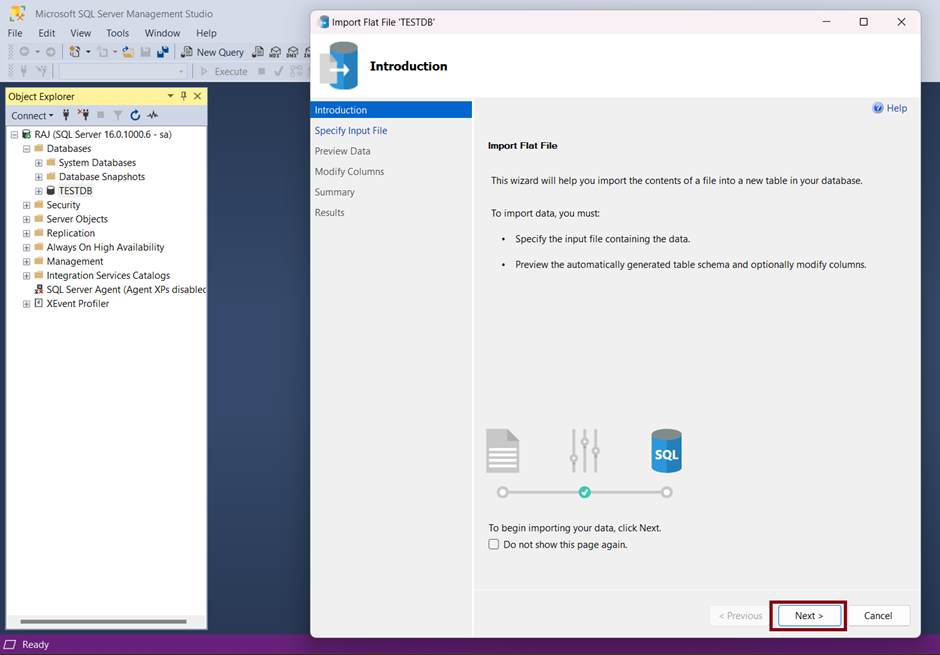
In SQL Server Management Studio (SSMS), right-click on the database which you want to import file and select “Tasks” > “Import Flat File.” To begin Importing your Data Click “Next”.
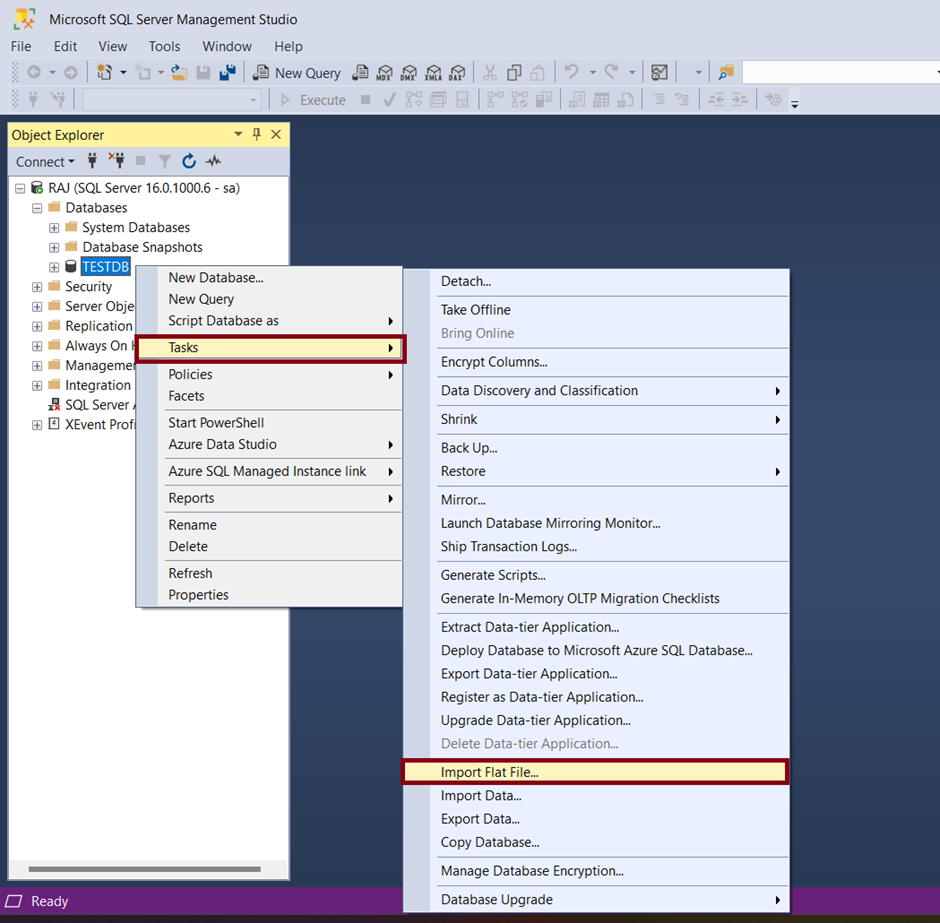
After click on Import flat file To begin Importing your Data Click “Next”.
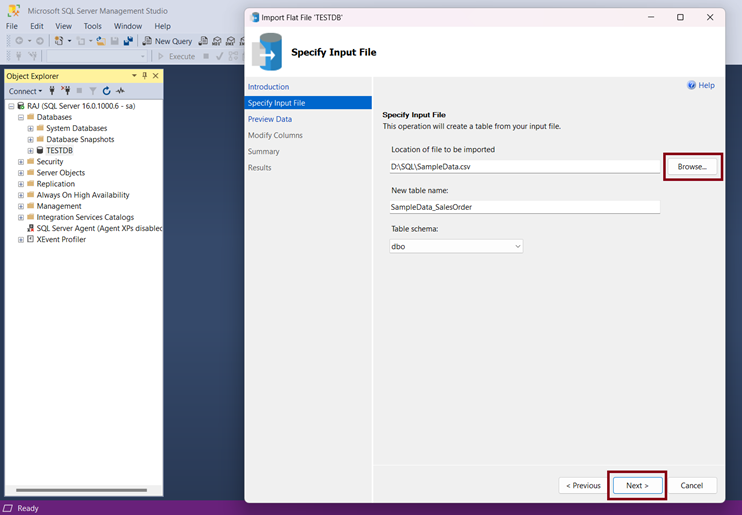
Step 4: Select Source File | Specify Input file.
choose the source file by using browse option and select the appropriate file format (CSV, Excel, or text file) Click on Browse and choose input file. Enter New Table name and select table schema like “dbo” and Click “Next” to proceed.
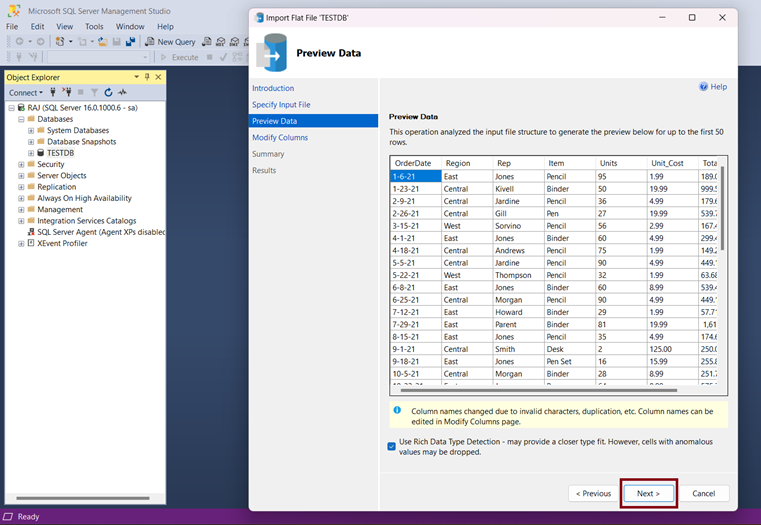
Step 5. Preview Data
It will analyze input structure to generate preview for first 50 rows. In this step we will see a data in your file to preview, click on “Next”.
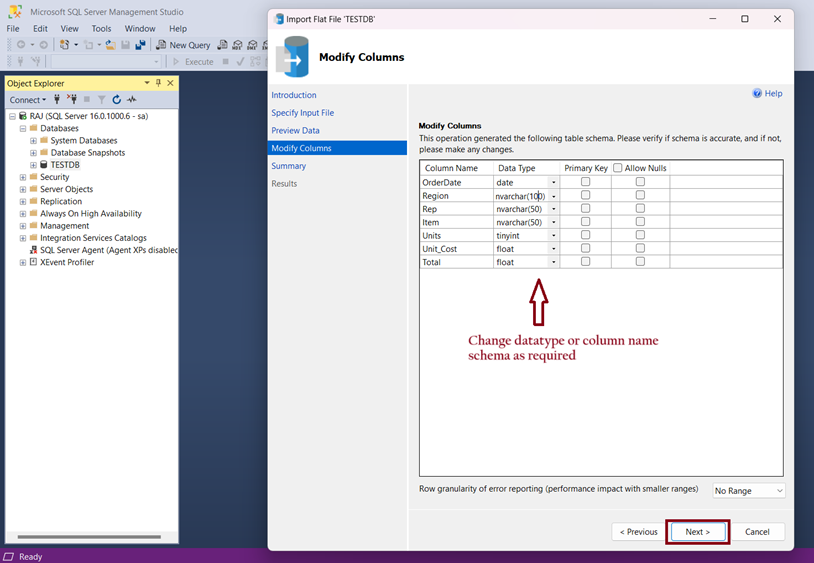
Step 6. Modify Columns
It will generate table structure as per data in your file, verify the schema is accurate if not make changes in schema as per your requirement.
In this step you can modify data type columns names, constraints and much more as per your requirement.
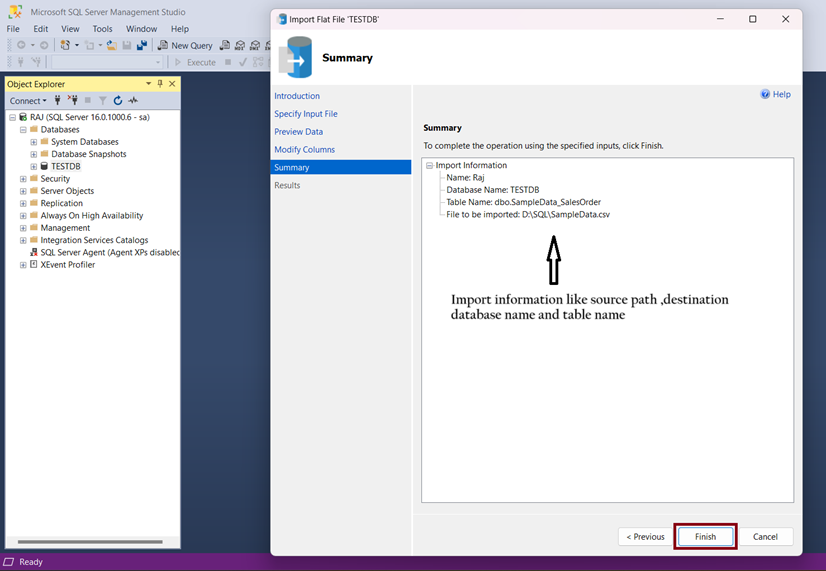
Step 7. Summary
In this step you will see an information of Source path from which you browse the file and destinations database and new table name. Click on “Finish”.
Review all setting of import once and preview data. If everything looks correct, click “Finish” to start the import process.
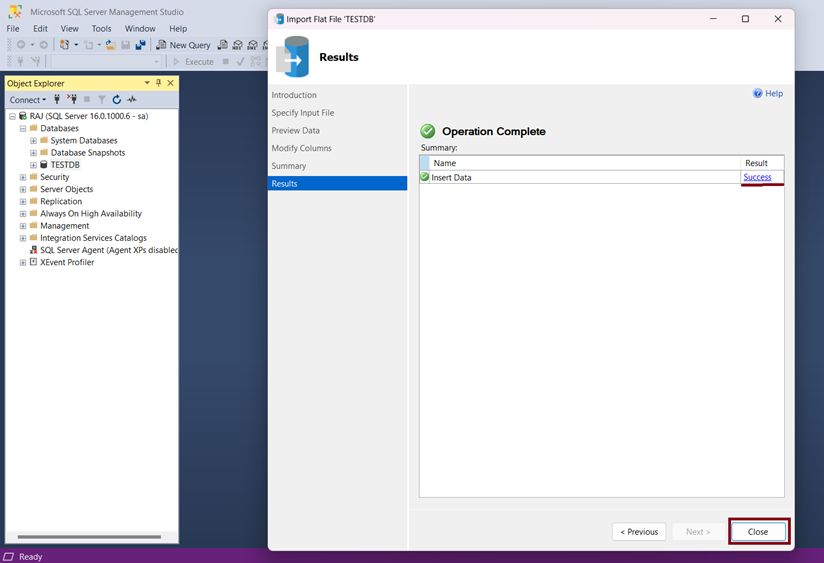
Step 8: Monitor the Import Progress
It will display the progress of the data import. Once completed, you’ll receive a summary of the import results, including any errors if any.
Steps to Import Data in SQL Server: Import Data Method
Another Wizard to get data from externally into SQL server is Import Data, this is also same like Import flat file some are changes which we will learn step by step below.
Steps To Import CSV file in SQL server.
A Step-by-Step Guide on How to Import Data into SQL Server using “Import Data” Option
Introduction
Import Data wizard will create destination database and tables into which the data is inserted. Another Wizard to get data from externally into SQL server is Import Data, this is also same as Import flat file some are changes which we will learn step by step below.
Import file from CSV or Excel into SQL server is easy activity for SQL developer/DBA to add external data into SQL server database using “Import flat file” and “Import Data” options.
To import CSV file in SQL server you need to create comma delimited file of excel and save it as .csv.
You can Customize the destination table to import data, you can either create a new table or import into an existing table.
Import data is very easy process in SQL server, in this article we will learn step by step guide on how to import data into SQL server | How to import data in SQL server from csv, Excel and text file.
SQL Server is providing different ways to import data. For this example, we’ll choose on the “Import Data” wizard, a versatile tool that supports different file formats like csv, txt, excel etc.
Steps to Import Data in SQL server Management Studio
Step 1: Prepare Your Data
Prepare Data before importing, make sure that data in file is well organized and compatible with SQL server, and file extension should be proper like csv, txt etc. If you wish to import in Existing table, make sure that columns sequence and data types should be matched with destination table. and if you are importing as new table you need to specify the columns data type as per the data present in the file. suppose you have a column like address and its data type and size is shorter than you need to modify the address column otherwise you will get as error while import. To Import Data in SQL server Supported file formats include CSV, Excel, and text files.
How to Create SQL Server Agent Job: SSMS
Step 2: Open (SSMS) and Connect
Open SQL Server Management Studio and connect to the SQL Server instance where you want to import your data. to connect your instance, enter server type, authentication type, Username, password, database etc. Ensure that you have the necessary permissions to perform data import operations.
Import Data in SQL server Using EXCEL, CSV, TXT file.
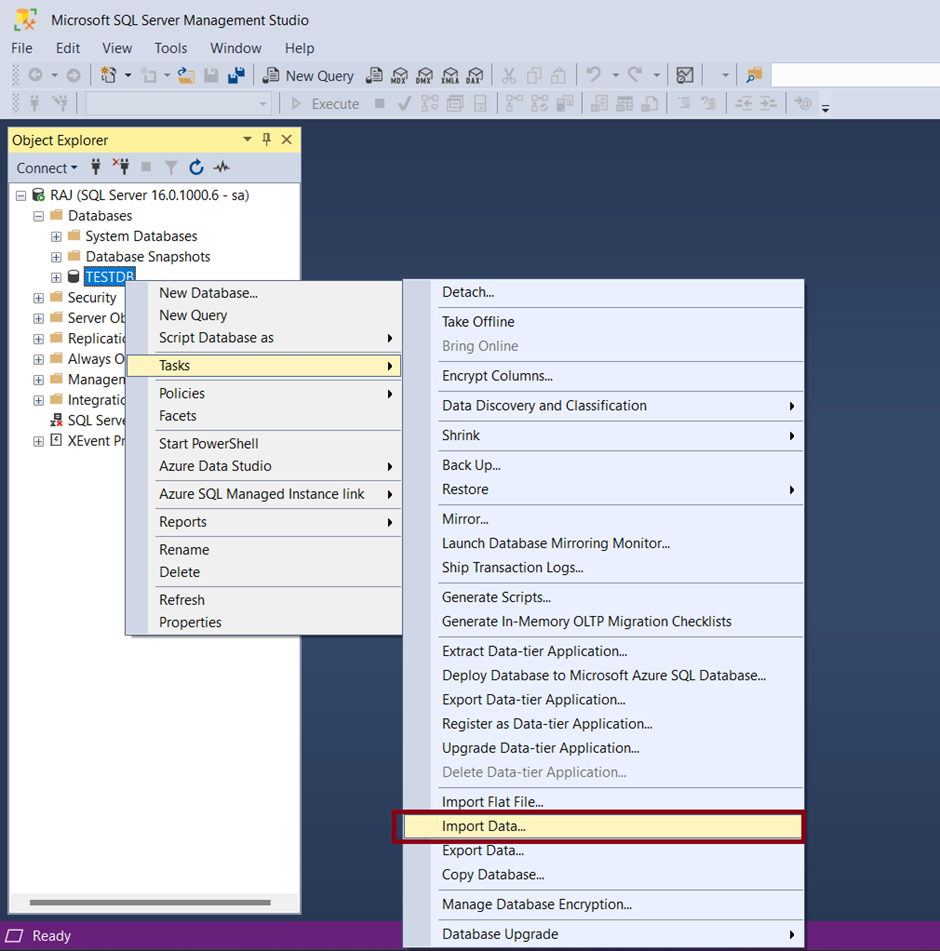
Step 3: Choose the Import Method
In SQL Server Management Studio (SSMS), right-click on the database in which you want to import csv file and select “Tasks” > “Import Data.”
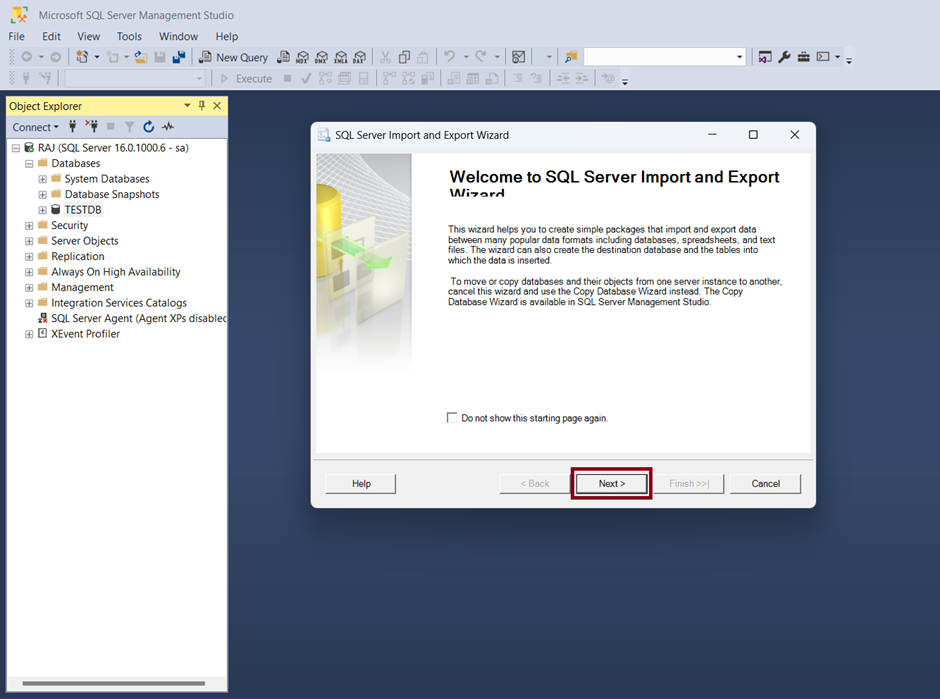
Step 4: You will see Welcome to import export page, To begin Importing your Data Click “Next”.
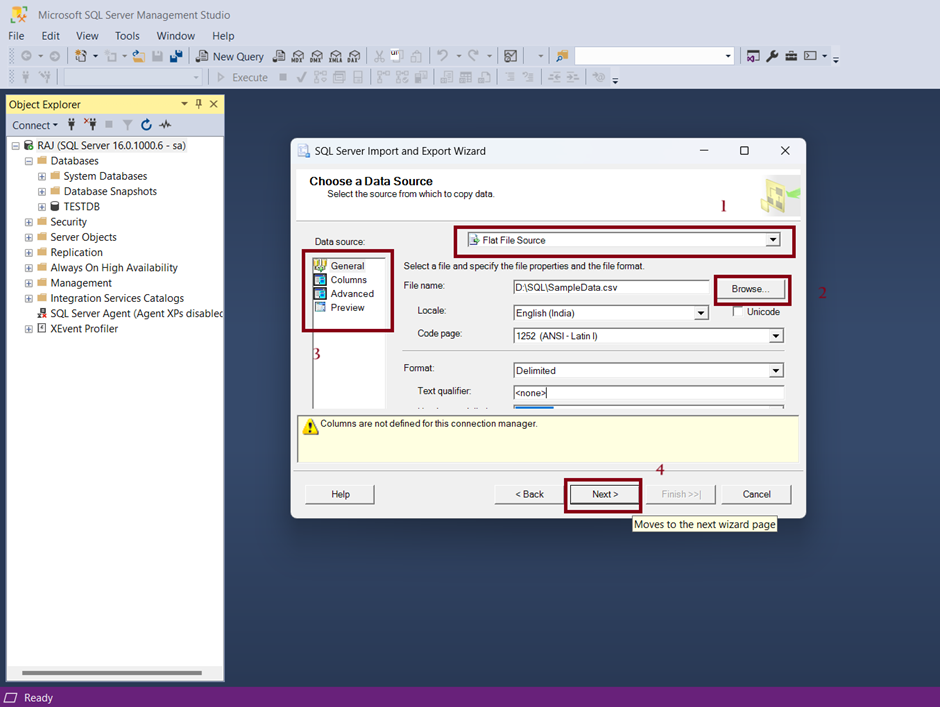
Step 5: Choose Data Source
select the data source from dropdown list from which you want to copy the data, you can choose flat file source, Excel etc. here we will select “flat file source” in which you can browse any file to imports.
Browse File
Browse the file with its file extension and specify the file properties, if you are browsing csv file then select the file type as *csv.
Here you will see a Four Options “General”, “Columns” “Advanced” and “Preview”.
General: in general option you can change the Locale, File format and file name etc.
Columns: In Columns Option you can specify the characters that delimits the source file like row delimiter, and column delimiter.
Advanced: IN advanced option you can configure the properties of each column, In this option you can change column name column size, data type etc.
Preview: This option shows the data to Preview, it shows the source divided into the specified columns.
specify the above details as required and click on “Next” to proceed.
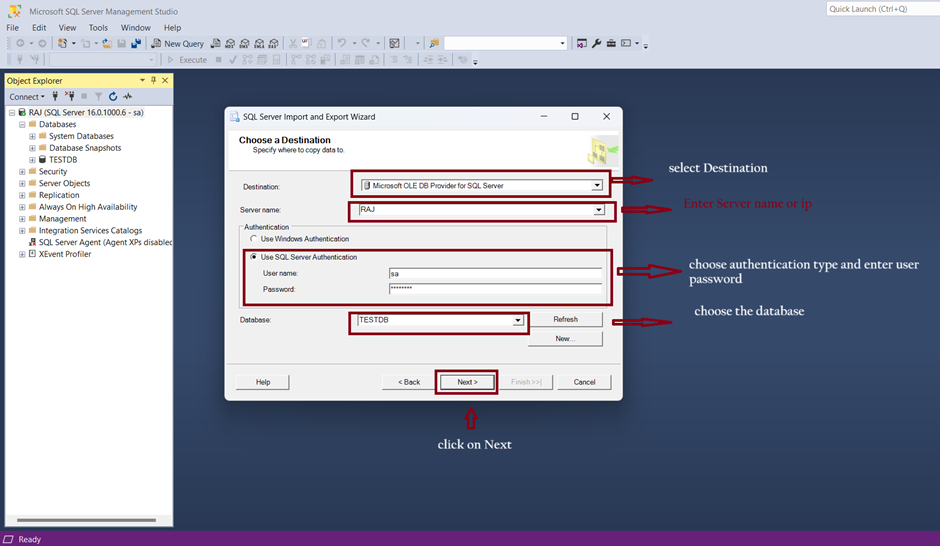
Step 7: Choose Destination
choose the destination where you want to copy the data, you will see different destination options. here we are importing data into SQL server so
choose the “SQL server Native Client 11”
You will ask the below details.
Destination: “SQL server Native Client 11”
Server name: Enter your SQL server name/ Ip or Instance.
Authentication Details : you will see a two authentication 1.”Windows Authentication”,2.”SQL server Authentication”.
Choose the authentication type if you choose “Windows Authentication” it will take your windows password automatically
if you choose “SQL server Authentication” then Enter username passwords of your SQL server.
Database: Enter database name in which you want to import the data and click “Next”.
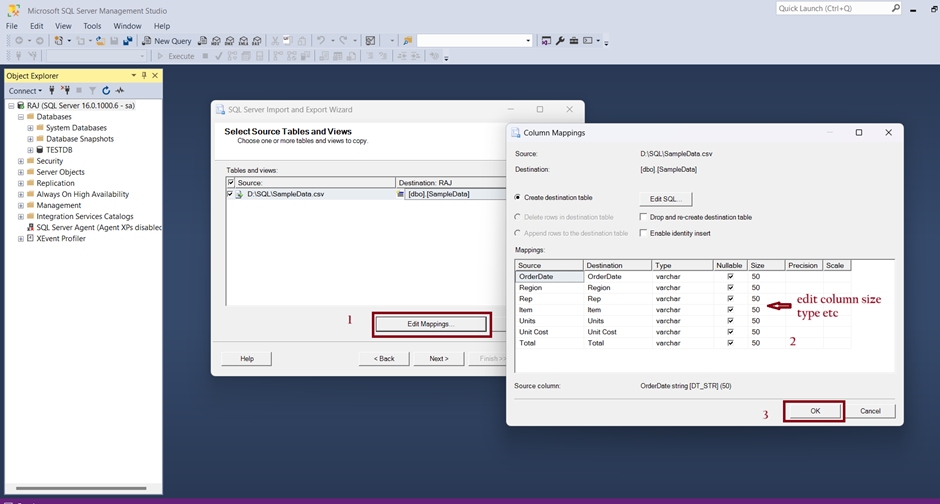
Step 8: Source Tables and Views and Edit Mapping
In this step you will see Source and Destinations Tables and views you can change the destination table name or give new table name here.
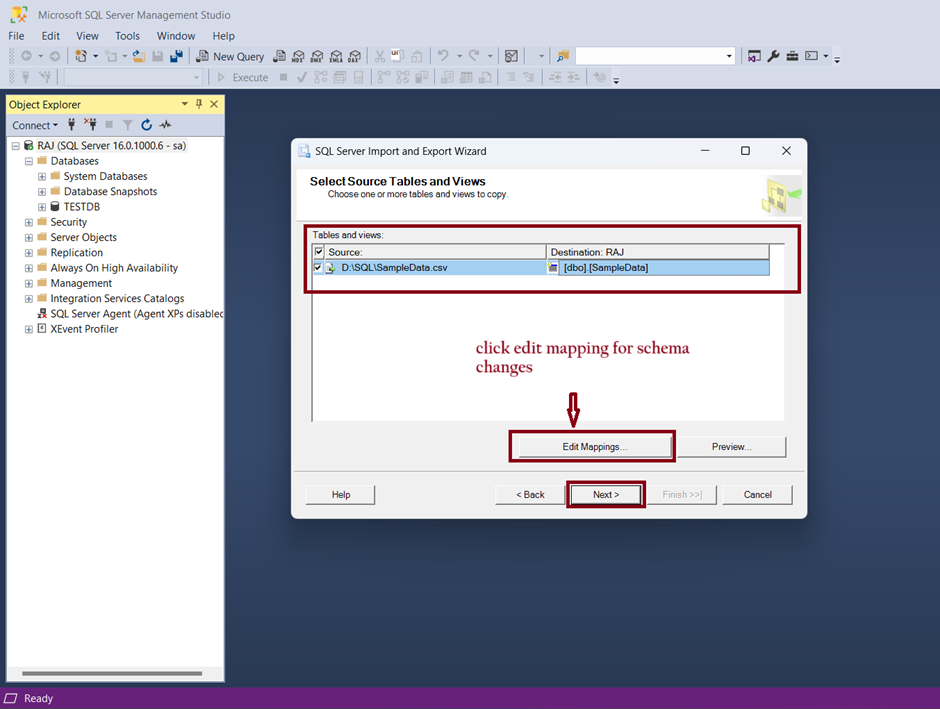
Edit Mapping: If you wish to change schema details like columns data type,size,columns names then click on “Edit Mapping” and change the schema as per your requirements.
Preview: You can show how your data will be stored in destination in Preview option. After setting the Columns mapping click on “Next”.
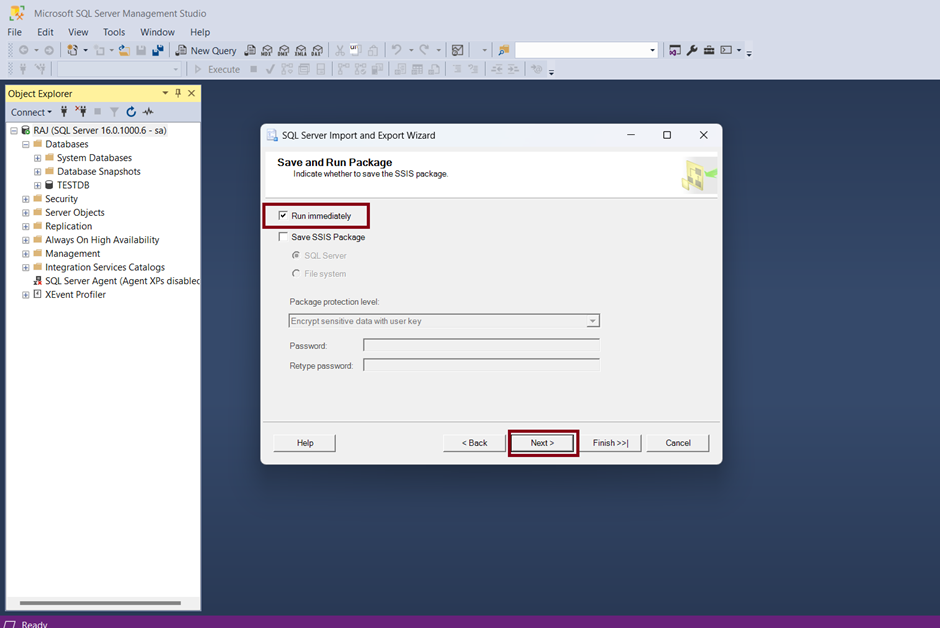
Step 9: Save and run Package
In this step you can save and execute this package immediately click on “run immediately” check box and click the “Next” Button.
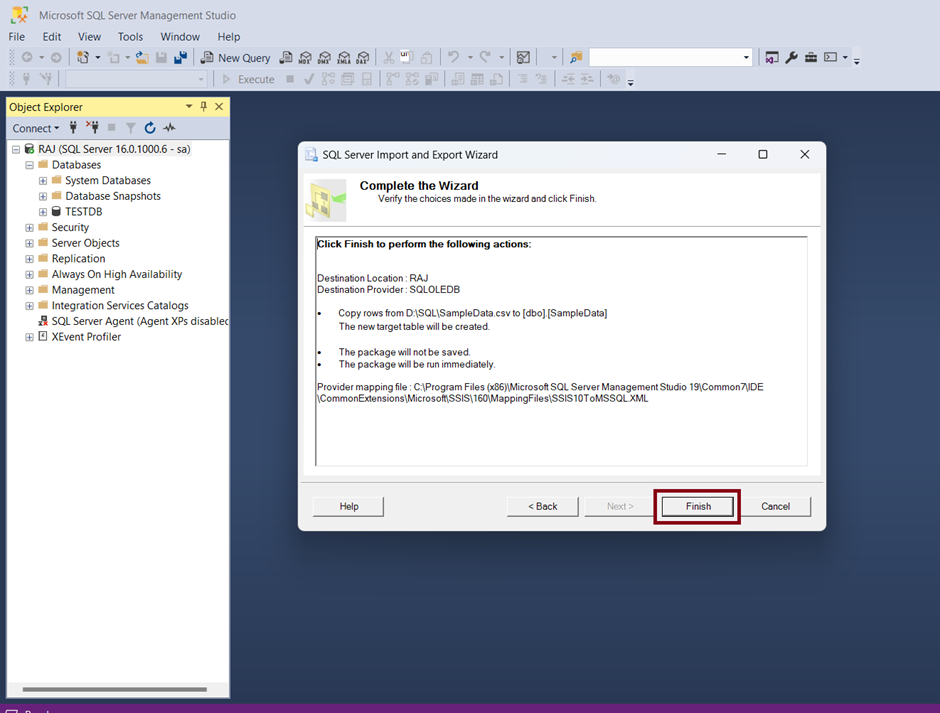
Step 10: Complete Wizard
Verify all the selected details to Import data in SQL server from csv. here you will see a summary of Source path file and destination path and table name
Click “Finish” to perform the Import Data operation.
Database Administration Archives – Developers Tutorial (itdevelopement.com)
After successful import you will see a screen like below with records affected in the table like “43 Rows transferred” click finish.
FAQ on Import Data in SQL Server
Q. What type of data can be imported in SQL server?
Ans: You can Import any flat file like CSV, TXT, EXCEL.
Q. Can we edit the data type of fields?
Ans: Yes, You can edit Field information like data type, Size, Columnname,constraints etc.
Q. What type of error can be occurred during Import data in SQL?
Ans: Errors can be Data Truncation, Destination table not found,etc. to avoid this type of error configure schema as per the destination table.
Q. How Many Was to Import Data in SQL server.
Ans: SQL server provide different ways to Import Data in SQL. Two of them are most used Import Wizards which are 1. Import Flat File 2. Import Data.